
Do you love the taste of Maple Syrup? Would you like to have your own Codwood Maple Sugar Shack? Ted Amman says YES to both questions.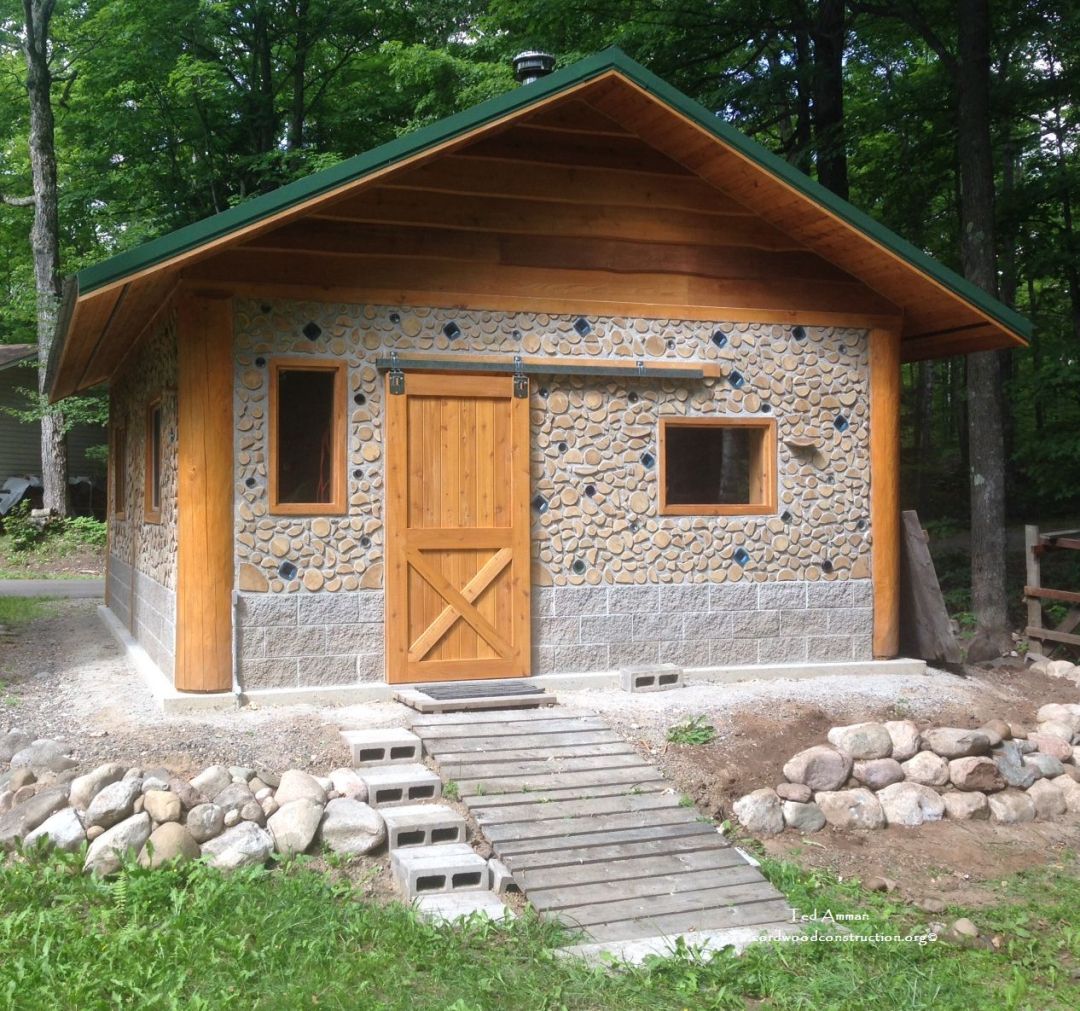 He wanted to build a “shack” to house his family maple syrup harvest. Ted attended a cordwood workshop, visited the Cordwood Education Center, read everything he could get his hands on, picked my brain aplenty and then went and built his own cordwood masterpiece. I think the reader will agree that this is much more than a “shack.”
 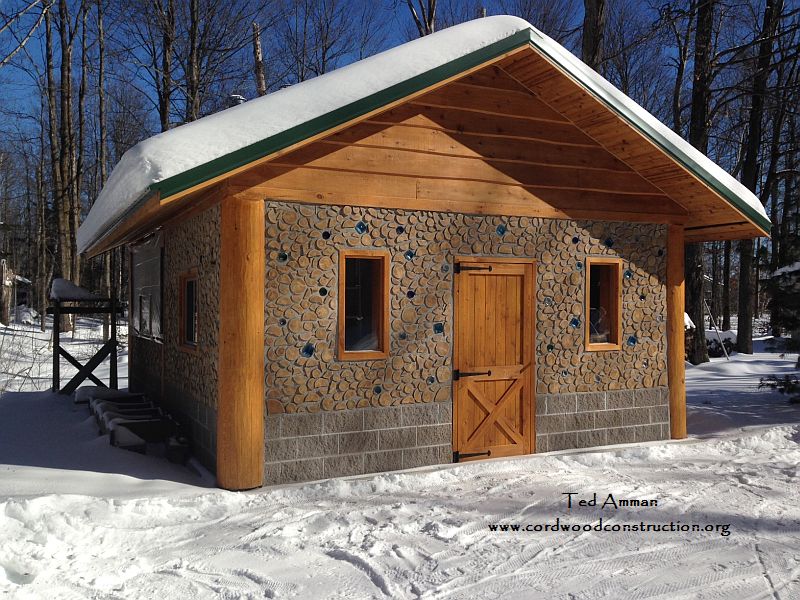 Ted gives sage advice with his comments (below). If you are planning to build using cordwood it is wise to take advice from someone with experience.
 The framework braced and ready for the roof.
  The split face block protects the cordwood from splashback in heavy snow or rain.
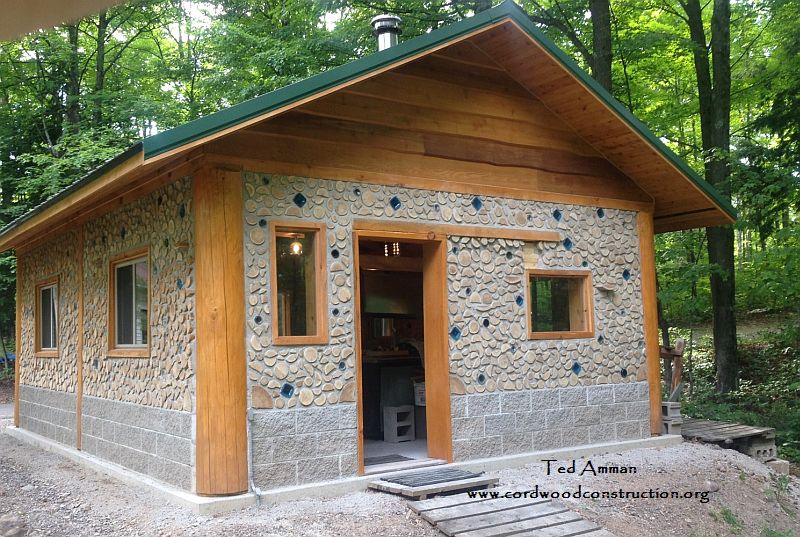
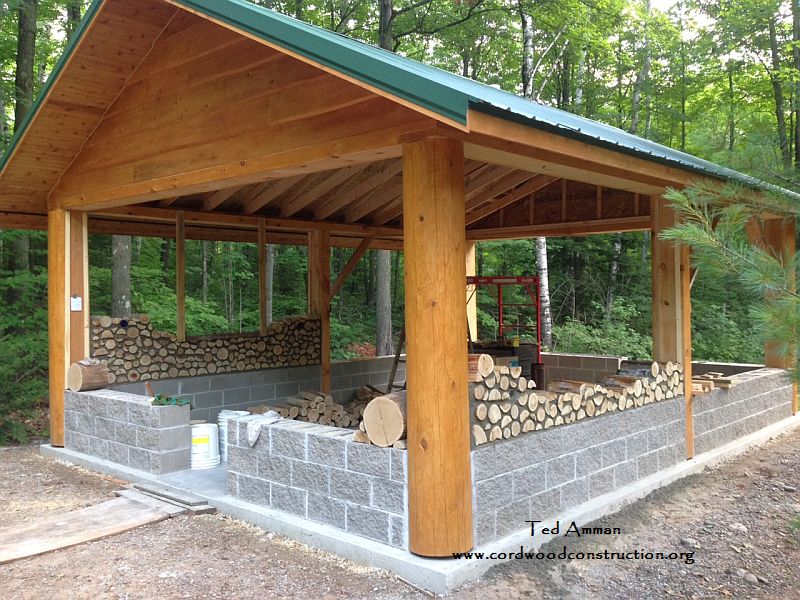 The cordwood commences. Notice how Ted uses a good random pattern with his wood selection.
Bottle ends: Ted says, “I found the wine/whiskey/gin bottles in the wall to be very attractive. Don’t cut them short. In my 11.5 inch wall, 12 inch bottles seem to draw light (from inside and outside) better than 11 inch bottles. Matching colored bottles with clear ones is ok but not necessary. If your colored bottle is dark (blue or green or whatever) match it up with a lighter version of the same color – yields a very nice effect both inside and outside. I used a lot of Sapphire Gin bottles – medium blue (square). I matched them with the same bottle (square & blue). The result was a very attractive blue. Then I started putting them in at an angle – like a diamond. That turned out very well. If you have a fairly large roof overhang like I do, put the bottles mostly in the lower 2/3 or 3/4 of the wall for maximum effect. Bottles up near the top look good on the gable ends but are pretty dark on the side walls.”
 Just before the snows arrived.
 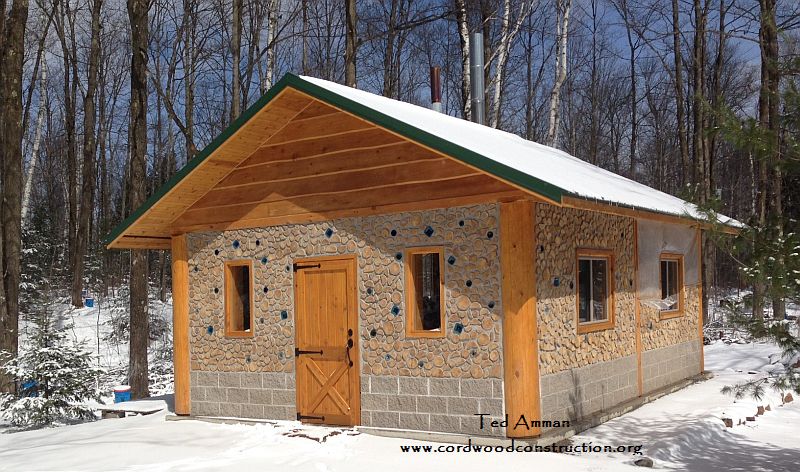 Winter descends and the sugar shack is all bundled up.
  The interior shows how the bottles light up with the sun.
Ted answered all my questions about his build.
1. Dimensions of the building? The outside dimensions are 18×24. With one-foot walls all around, the inside dimensions are 16×22. The walls are slightly over 8.5 feet high.
2. Posts and beams of what species? The corner posts are approx 16 inches in diameter and are red cedar (from the Pacific Northwest). The side posts and beams are rough-cut white pine from N Wisconsin.
3. Width of the cordwood wall? The cordwood wall is 12 inches thick.
4. Species of wood for cordwood infill? All of the cordwood used in the walls were white cedar, dried +five years from the UP of Michigan. I bought the wood from Steigers in Hudson, WI.
5. Trusses, what style? The trusses were common W style and came from Pukalls – a lumber yard in Arbor Vitae.
7. Suggestions you would offer to wannabe cordwood masons! Hah! Where to begin! First off, attend one of your workshops to practice, learn and build your confidence. I consider the workshop essential to building successfully. A friend of mine read about cordwood building (not from your book) and did his own garden shed – five inch walls using fresh cut hardwood. The result was a very uneven wall with multiple cracks and is likely to topple over before long. If possible, build a small building for practice after attending a workshop. I skipped this part but, in hindsight can certainly see the value of a practice building. Second, draw out what you want and then tinker with it until it shows what you want it to look like. Third get Richard’s book and research the options for foundations, floors, structure, walls, mortar and decorations/bottles, marbles,stones, etc. Then reread the applicable parts of Richard’s book at least 3-4 times more. Fourth, visit the Merrill School Forest Cordwood Education Center and any other cordwood buildings to get ideas. Fifth, find some gullible friends and relatives to help with the wall building but maintain strict quality control. If you end up with only one reliable partner, as I did, quality control was fairly easy but the work was exhausting at times. A few other suggestions – keep your first batches small until you find out how much you can handle before the mortar gets too dry to work with. Don’t forget that careful striking off (tuck pointing) takes time. For me, each batch meant 30-40 minutes of tuckpointing. We could easily do 6-8 batches by 4 pm each day but that meant 3-4 hours of tuck pointing. Hence it was frequently 8-9 pm before I finished the tuck pointing. There were many other things I learned but these are some that come to mind.
Congratulations and well-done to Ted Amman!
Should you wish to learn how to build a cordwood cottage, cabin or home, please visit www.cordwoodconstruction.org While you are there, click on the pictures, read the brief articles, check out the latest workshops and newsletter and if you are interested click on the Online Bookstore to see all the cordwood literature available in print and ebook format.
If you have questions that aren’t answered on the website you can email me at richardflatau@gmail.com
Readers have requested a brief bio, so here goes:
“Richard & Becky Flatau built their mortgage-free cordwood home in 1979 in Merrill, Wisconsin. Since then, they have written books, conducted workshops, facilitated the 2005, 2011 and 2015 Cordwood Conferences and provided consultation for cordwood builders. Cordwood Construction: Best Practices DVD, Cordwood Construction Best Practices (print) and Cordwood Conference Papers 2015 are the newest publications available from their online cordwood bookstore. www.cordwoodconstruction.org

Click on the picture if you would like to order this “best of the best” DVD.


