Cordwood Flooring
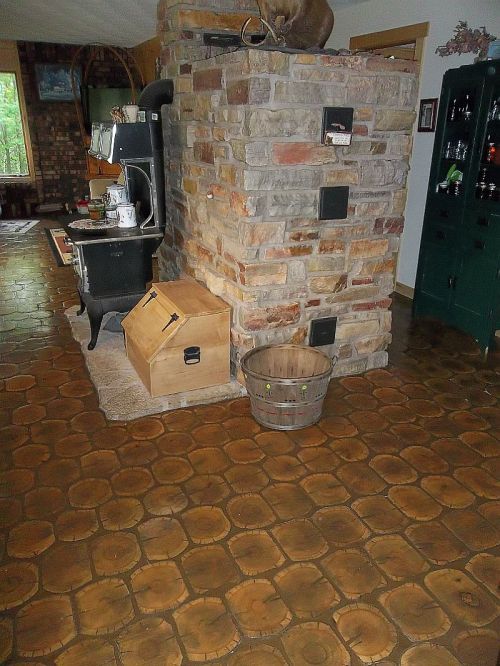
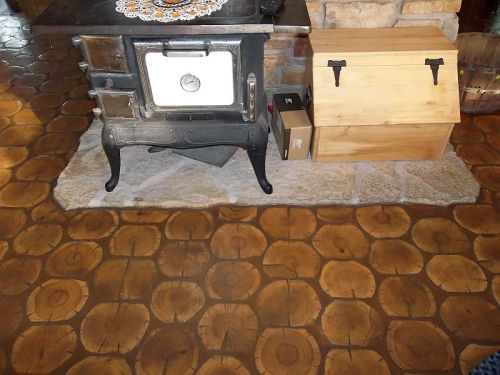
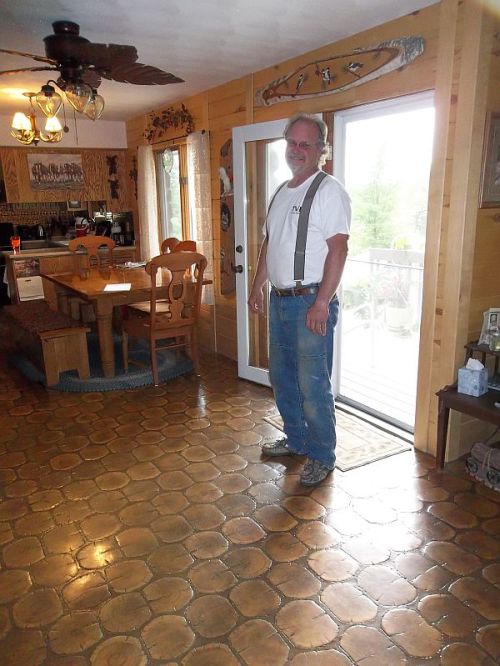
My neighbor Steve called up the other day and asked if I’d like to come over to see his new floor. Steve is a contractor by trade, he does beautiful work, so I jumped at the chance. When I walked in the door my mouth fell open. He had built a cordwood floor! It was beautiful, warm and artistic. The colors were tan and brown and the floor was polished to a shine.
Here is the latest (with instructions) on the cordwood floor from an article we wrote for Backhome Magazine. https://www.cordwoodconstruction.org/img/Backhome_Article_Cordwood_Floor_LeesCOMPRESSED.pdf
I asked Steve how he built this floor. He said he had bought some old hardwood barn beams at an auction and decided to use them for flooring. First he cut hundreds of 5/8″ “log end” slices on a bandsaw. Then he placed the slices onto a plywood subfloor. He kept them in place by using Construction Adhesive. Then he used regular flooring grout, mixed with sawdust in an 80/20 ratio (80% grout/20% sawdust). After the grout had set, he came back with a heavy duty floor sander, smoothed the whole floor and blasted the grout off the faces of the log end slices.

The Russian Masonry heater starts in the basement and works its way upward. It keeps the house warm with one firing a day!
Finally he sealed the floor with a commercial grade sealer. Steve says that if he had it to do over again, he would first seal the log end slices before attaching them to the sub-floor. He figures this would cut down on the amount of sealer he used. The hardwood sawdust would probably change to softwood sawdust next time to slow the set and cure of the grout.

Each log has a unique pattern. Steve talks about the growth rings in the wood and how tight they are, meaning that the wood grew slowly over many years.
All in all his floor is durable, stunning to look at and adds quite a nice touch to the Russian Masonry Stove Heater in the middle of the house. Steve and Sharon have a wonderful homestead complete with horses, chickens, cows, dogs, cats and children.
The bathroom has a claw foot tub, hand-made cabinets with a chickadee motif and real rock (not culture stone) walls.
For information on how to do cordwood walls why not take a peek at www.cordwoodconstruction.org
While you are there, check out the menu: Photos, News, Workshops, Links, Articles and the Eye Candy.


